Translation Engine
A translation engine lets you create a personalized solution for your specific language needs. If our four default engines don't meet your needs, a custom engine can provide better control over your translations.
All Available Translation Engine Options
Translation engines are categorized into two main types:
Default Translation Engines:
- • ST DeepL Default
- • ST Google Translate Default
- • ST AI Default (Chat GPT)
- • ST AWS Default
Custom Translation Engines:
- • Custom DeepL Translation Engine
- • Custom Google Translation Engine
- • Custom Chat GPT Translation Engine
- • Custom AWS Translation Engine
- • Custom Translation Engine
ST DeepL Default:
How to Activate:
- Navigate to "Translation Engine" in the NavBar
- Select ST DeepL Default
- Click on the button named "InActive"
Note: Default engine, no API key required.
ST Google Translate Default:
How to Activate:
- Navigate to "Translation Engine" in the NavBar
- Select ST Google Translate Default
- Click on the button named "InActive"
Note: Default engine, no API key required.
ST Chat GPT Default:
How to Activate:
- Navigate to "Translation Engine" in the NavBar
- Select ST Chat GPT Default
- Click on the button named "InActive"
Note: Default engine, no API key required.
ST AWS Default:
How to Activate:
- Navigate to "Translation Engine" in the NavBar
- Select ST AWS Default
- Click on the button named "InActive"
Note: Default engine, no API key required.
Custom DeepL Translation Engine:
DeepL API integration for real-time and batch translation services with advanced customization.
- Navigate to "Translation Engine" in the NavBar
- Select Custom DeepL Translation Engine
- Enter your DeepL API Key and and other required fields
- Configure translation settings and glossary options
- Click on "Create" Button
Note: Requires DeepL API Key. Supports glossary integration and advanced configurations.
Custom Google Translate Engine:
Integrates with Google Cloud Translation API using OAuth 2.0 authentication.
- Navigate to "Translation Engine" in the NavBar
- Select Custom Google Translate Engine
- Enter Auth URL, Token URL, and Callback URL
- Provide Client ID, Client Secret and other required fields
- Set Google Cloud Project ID and Location
- Configure language settings and glossary options
- Click on "Create" Button
Note: Requires OAuth 2.0 credentials and Google Cloud configuration. Supports extensive language pairs and glossary integration.
Custom Chat GPT Translation Engine:
OpenAI GPT integration for context-aware translations with tone and formality control.
- Navigate to "Translation Engine" in the NavBar
- Select Custom Chat GPT Translation Engine
- Enter your OpenAI API Key and other required fields
- Configure translation settings and context options
- Click on "Create" Button
Note: Requires OpenAI API Key. Supports advanced language customization.
Custom AWS Translation Engine:
AWS integration for secure and scalable translations.
- Navigate to "Translation Engine" in the NavBar
- Select Custom AWS Translation Engine
- Enter AWS Access Key and Secret Key
- Configure language pairs and translation settings
- Click on "Create" Button
Note: Requires AWS credentials. Supports custom translation models.
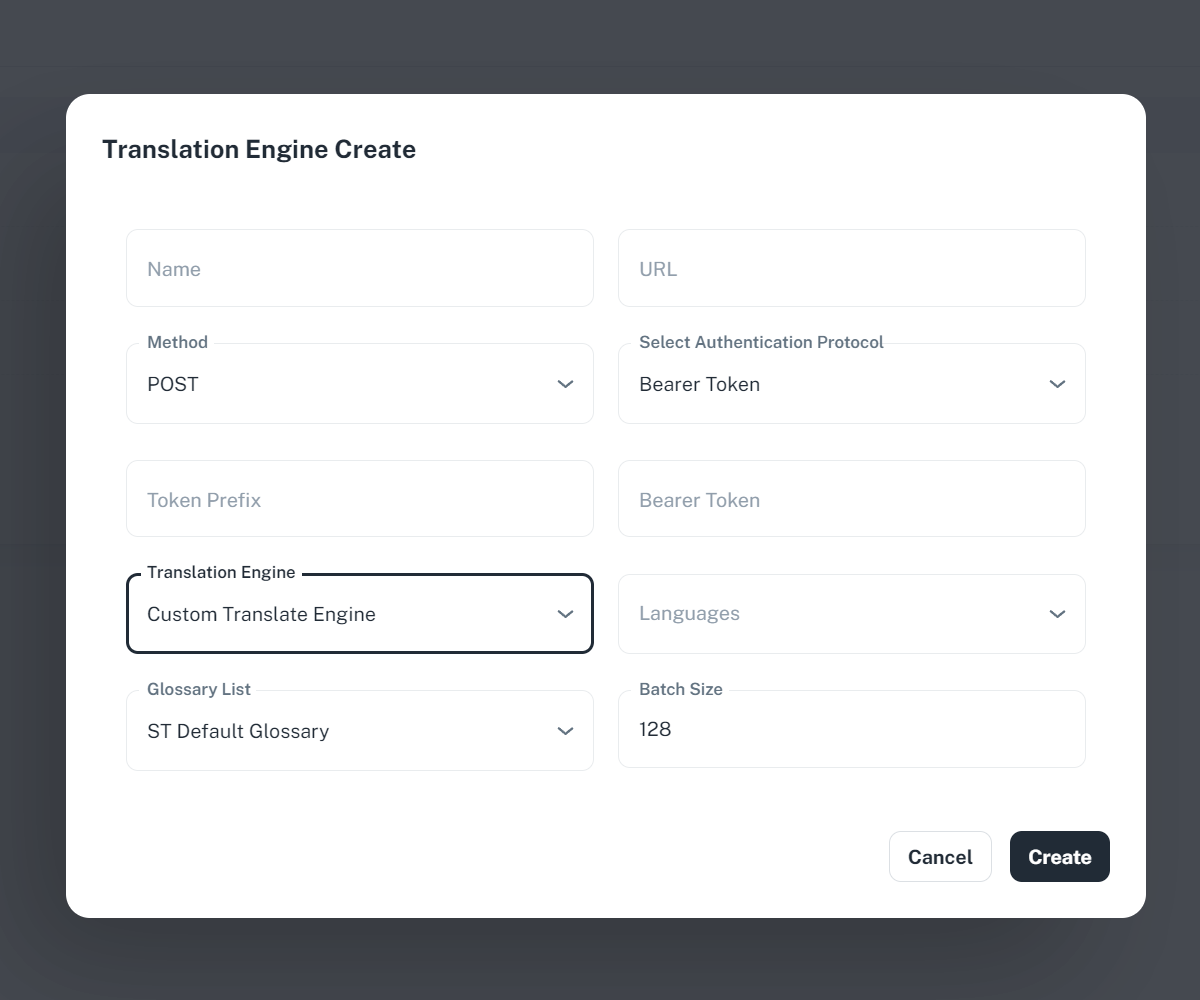
Custom Translation Engine
Flexible integration with custom translation services.
- Navigate to "Translation Engine" in the NavBar
- Select Custom Translation Engine
- Choose authentication method (Bearer Token, OAuth 2.0, Basic Auth)
- Select desired structure (DeepL, Google, Chat-GPT, AWS)
- Enter required credentials based on selected method
- Configure language settings
- Click on "Create" Button
Note: Supports multiple authentication methods and request structures for custom integrations.
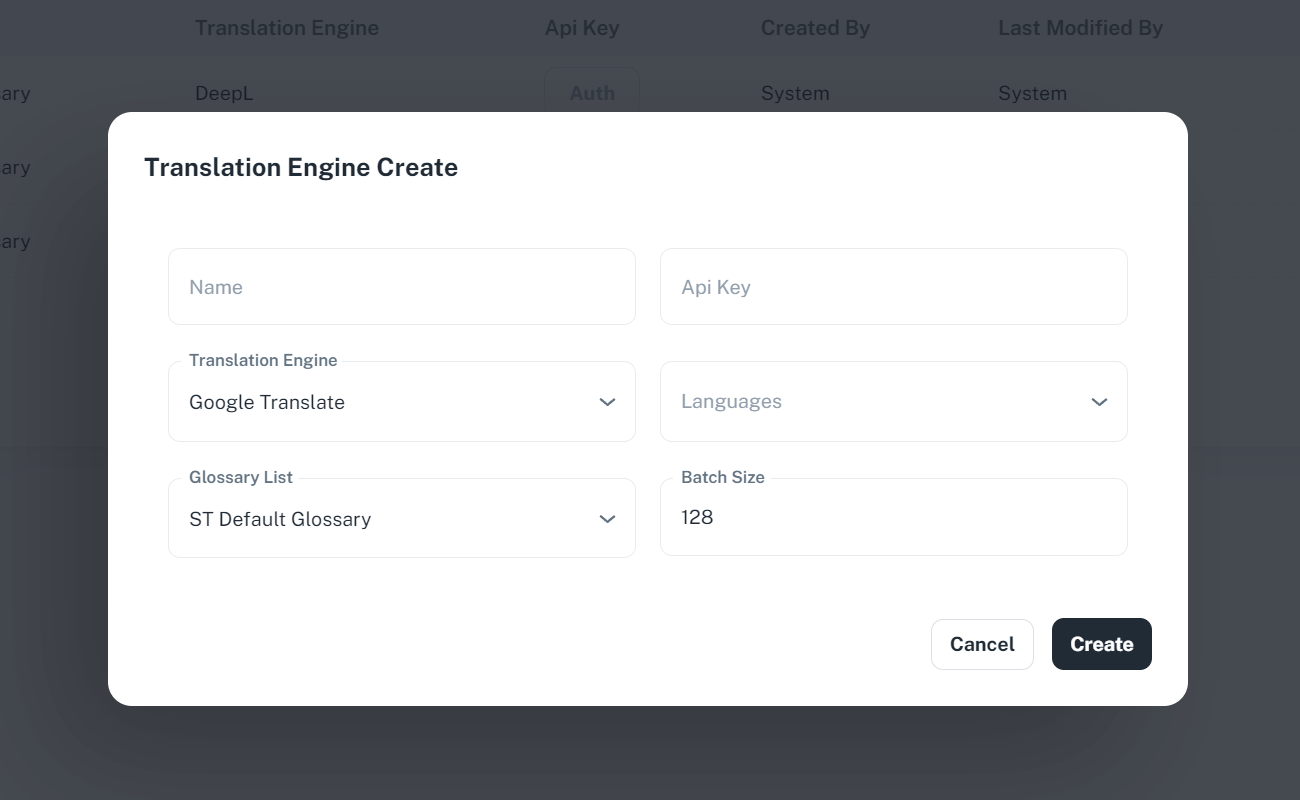
Create Default Engine
- Navigate to "Translation Engine" in the NavBar
- Click "Add Translation Engine"
- Select default engine (DeepL, Google, Chat GPT, AWS)
- Accept terms and conditions
- Click "Create" to finish
Create Custom Engine
- Navigate to "Translation Engine" in the NavBar
- Click "Add Translation Engine" and select "Custom"
- Choose authentication method:
- Bearer Token: Token Prefix + Bearer Token
- OAuth 2.0: URLs, Client ID/Secret, Scope
- Basic Auth: Username + Password
- Set API method and structure
- Click "Create" to finish
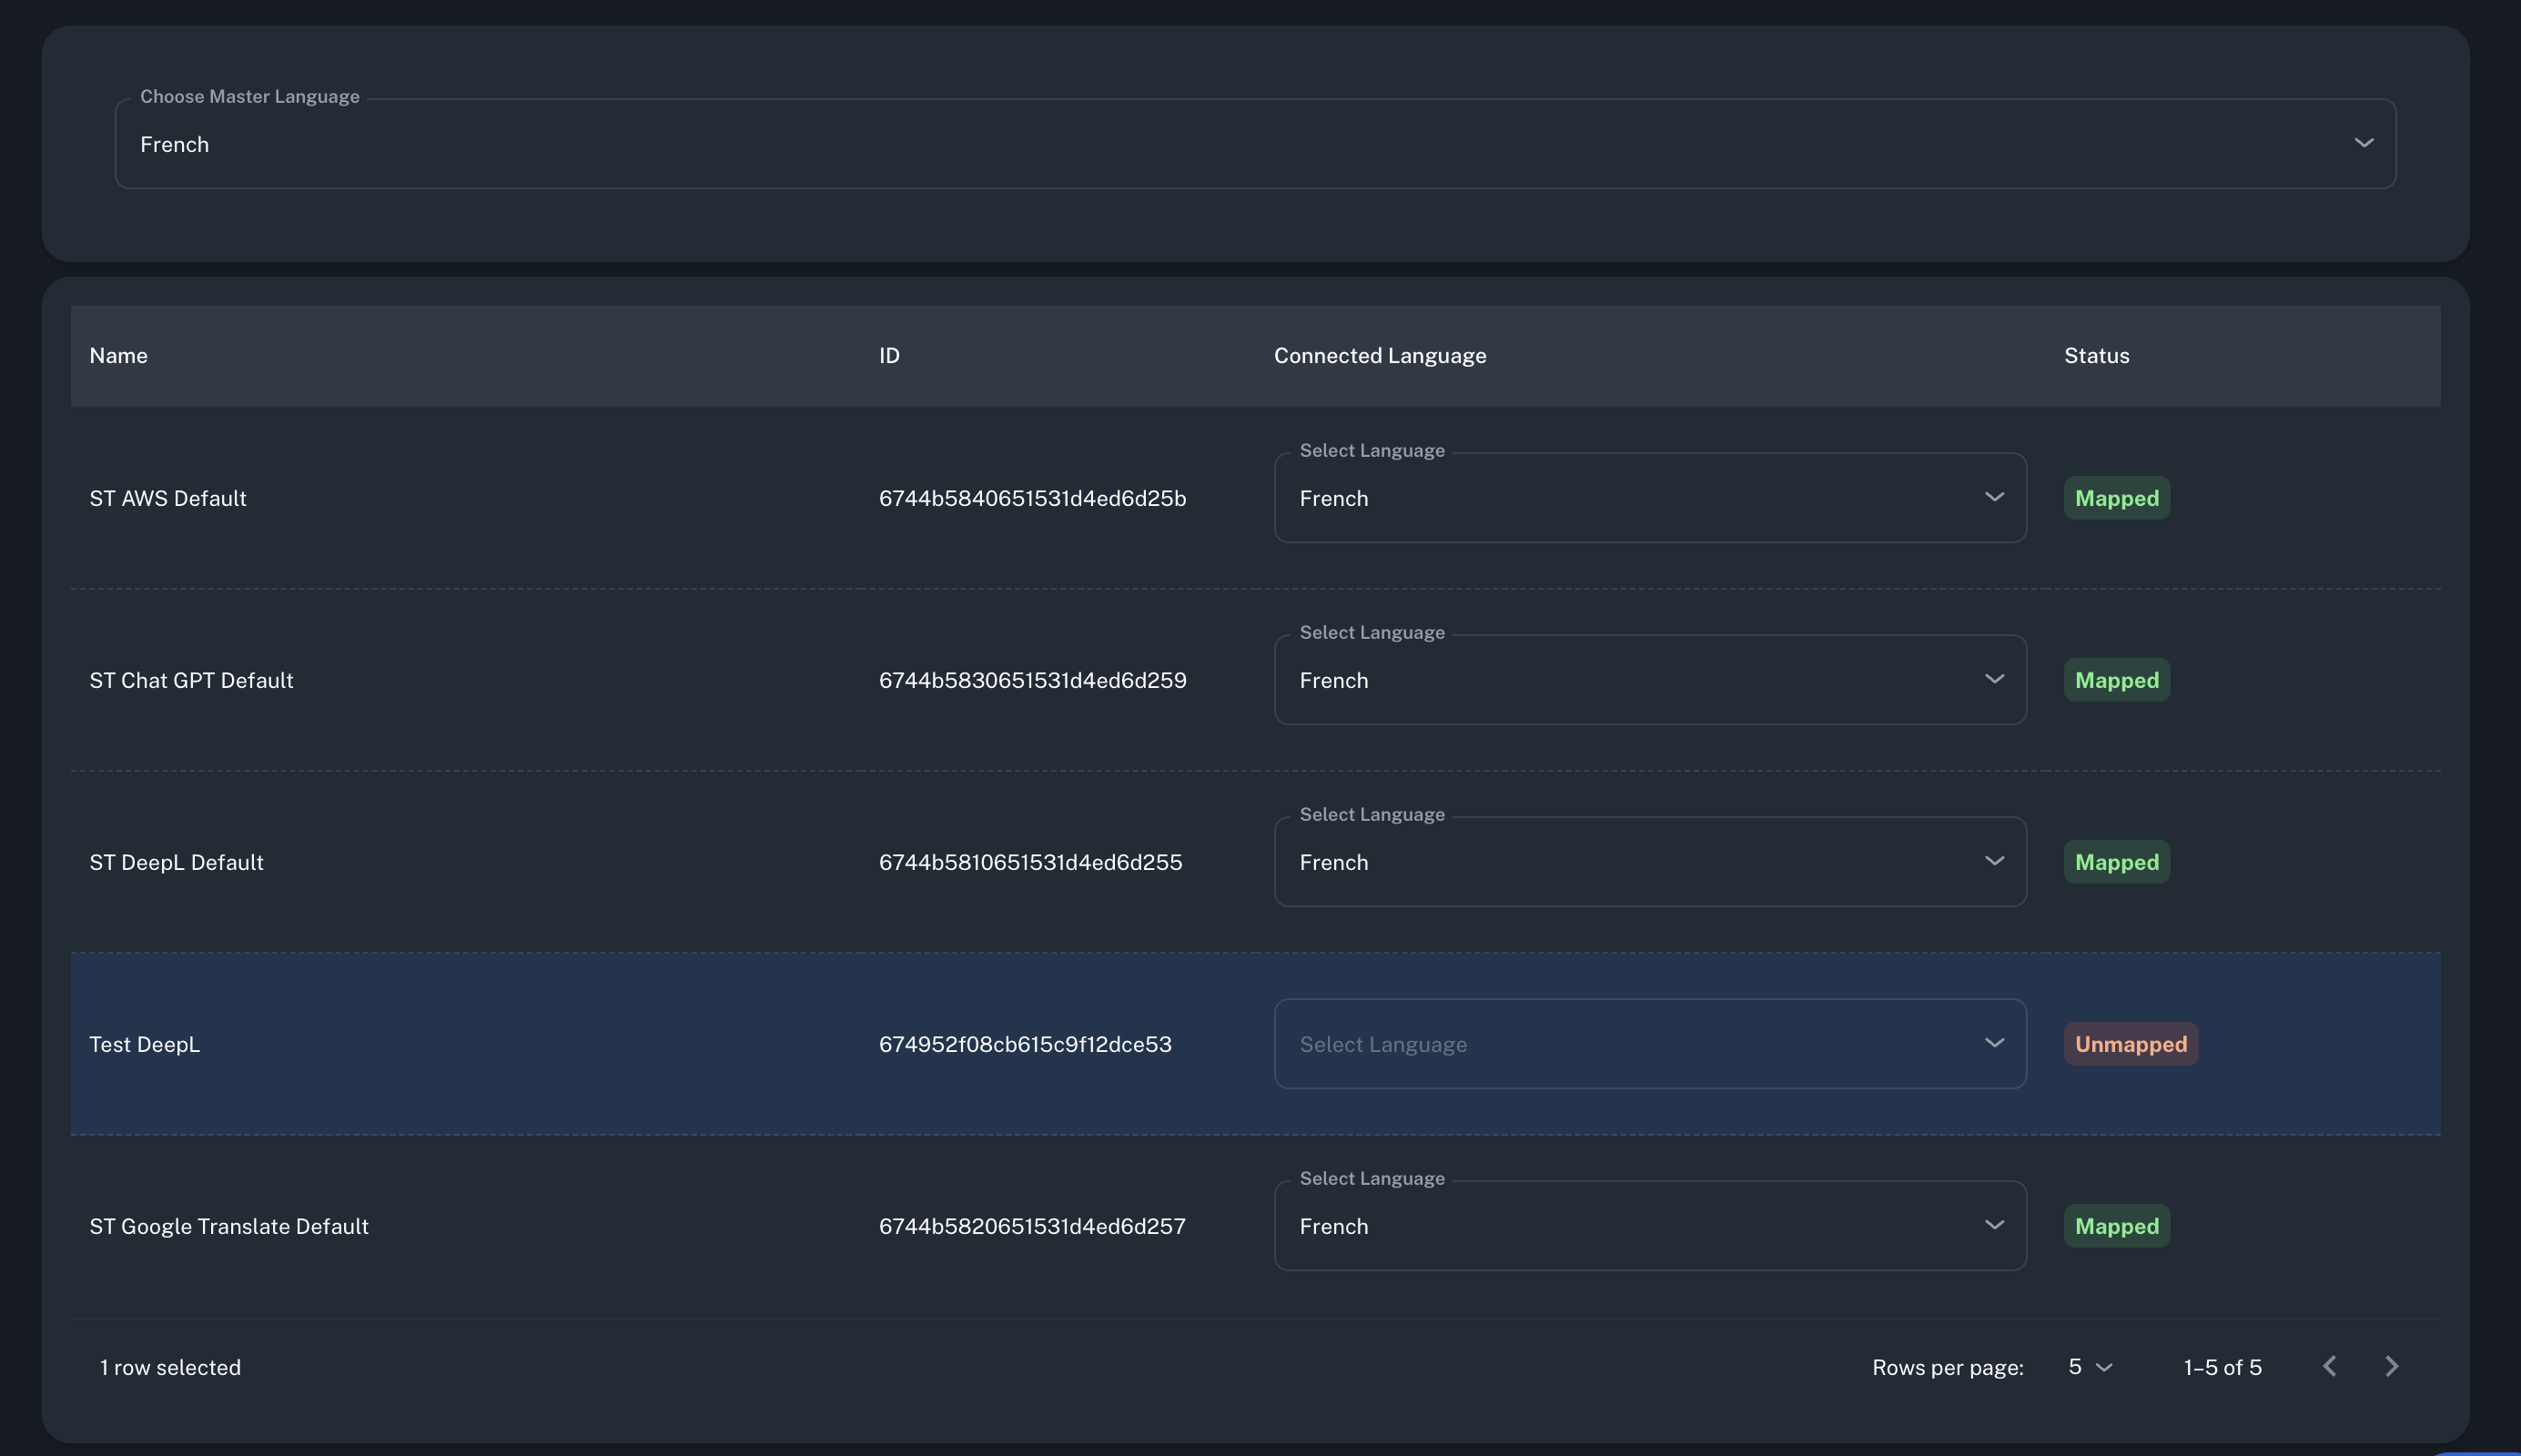
Language Mapping
Before starting translations, map your languages to the translation engine:
- Navigate to "Translation Engine" in the menu
- Find your translation engine and click "Select Language"
- Choose the languages supported by your engine
Note: Translation will only work for mapped languages